
System administrators have the ability to create and edit content channels.
Your portal and screen views will reflect your organization’s specific naming conventions, terminology, and configuration choices.
-
Click Administration in the tabs along the top of the screen.
-
Locate the Content Management menu and click Content Channels.
-
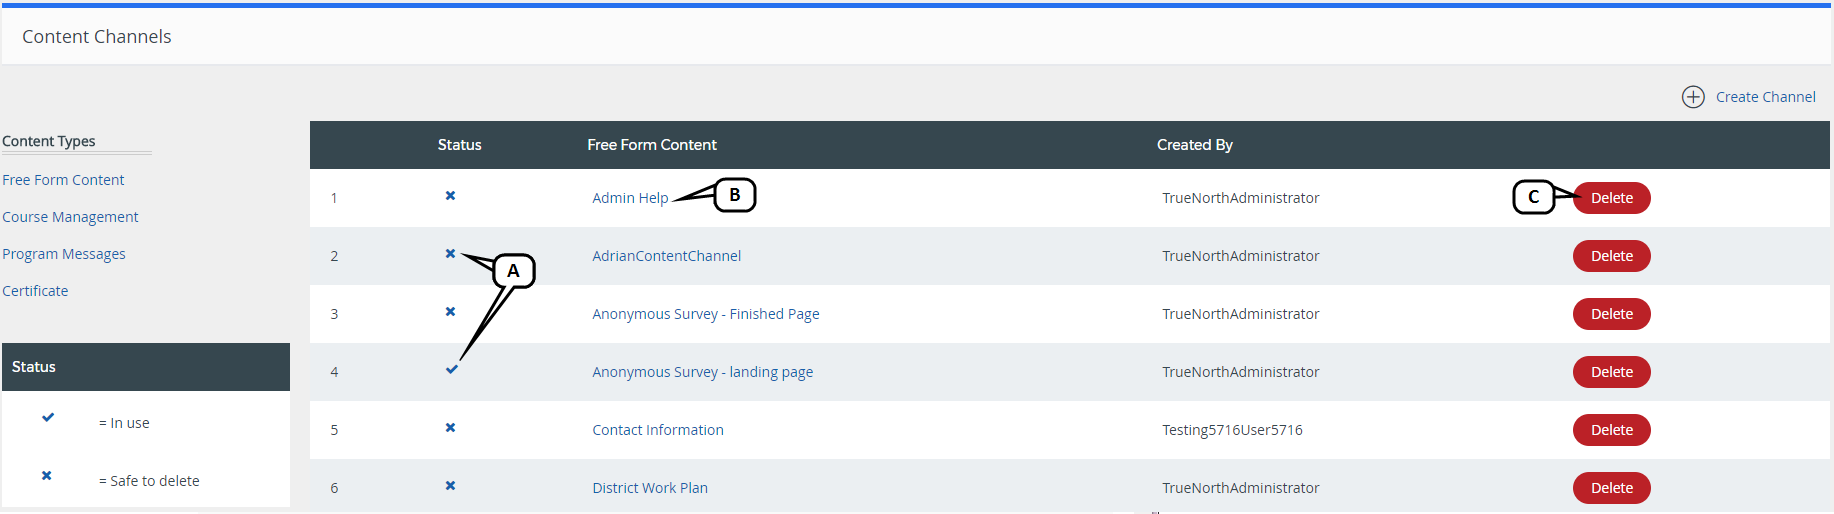
All existing channels are listed.
-
The status of each channel appears to the left of each title; x indicates inactive, check-mark indicates active. This status indicates if the content channel is currently being displayed somewhere on the portal.
-
Click on a channel name to edit the channel.
-
Click Delete to remove a channel.
-
Create a Content Channel
-
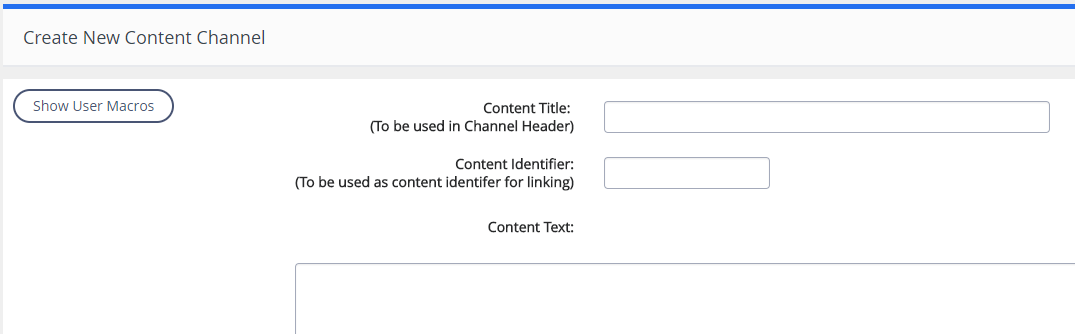
To create a new channel, click Create Channel.

-
Complete the fields to create the content channel.
-
Content Title - determines how the channel will be labeled on the home page
-
Content Identifier - identifies content for linking purposes; this field is optional
-
Content Text - the text for the channel; this can be plain text or HTML, including images, videos, or any other media; this is also where you will link to content housed in the content repository
-
-
Select Save Content Channel to create the channel.
Add HTML Content
To add content using HTML, use a free HTML text editor such as html.am for basic HTML code.
-
Open a separate browser and navigate to html.am (or another HTML editor).
-
Delete the content in the HTML generator field and enter the text as you want it to appear in the channel.
-
Convert the text to HTML.
-
Copy the HTML, navigate to the channel, and paste the content into the Content Text field.
Add a Link to Uploaded Content
To add a link to content uploaded to the content repository, follow these steps.
-
Locate the permanent link for the location of the document (instructions below).
-
Use the following syntax to display the file link. <a href="permanent link">linked display text</a>
-
When entering more than one link, input <br/> on the following line to insert a line break between links
Example:
<a href="https://district.truenorthlogic.com/ia/attachments/ resourceMgmt20/_Teacher's%20Guide%20to%20PDAS.mp4"> Teacher's Guide to PDAS (Video Tutorials - All Clips)</a>