Manage Buildings/ Rooms
Building and Rooms can be edited, added, deleted, and disabled from the Manage Buildings/ Rooms page. To access this page, click Manage Buildings/ Rooms.
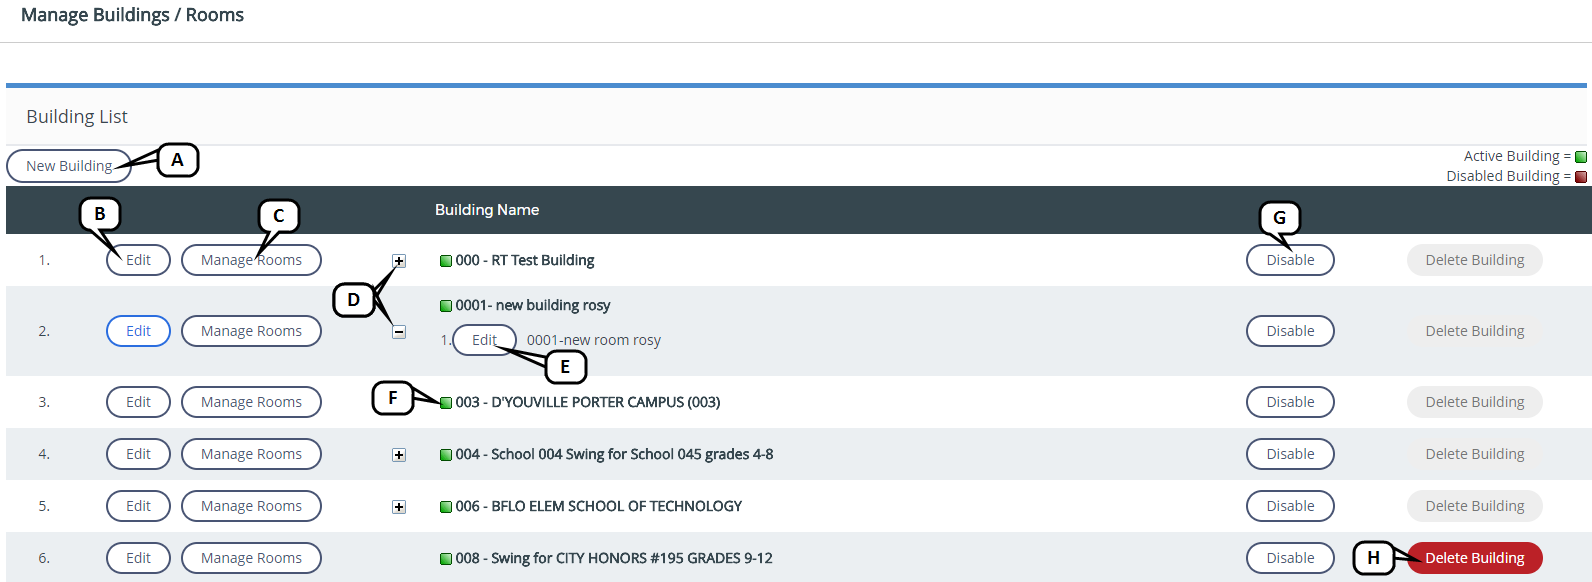
- New Building: Click to add a new building.
- Edit: Click to edit an existing building.
- Manage Rooms: Click to add or remove rooms associated with the building.
- + or - : Click to expand or collapse rows to display room associations.
- Edit: Click to edit an existing room.
- Colored box: Green indicates an Active Building. Red indicates a Disabled Building.
- Disable: Click to disable the building.
- Delete Building: Click to delete a building.
New Building
To add a new building, follow these steps:
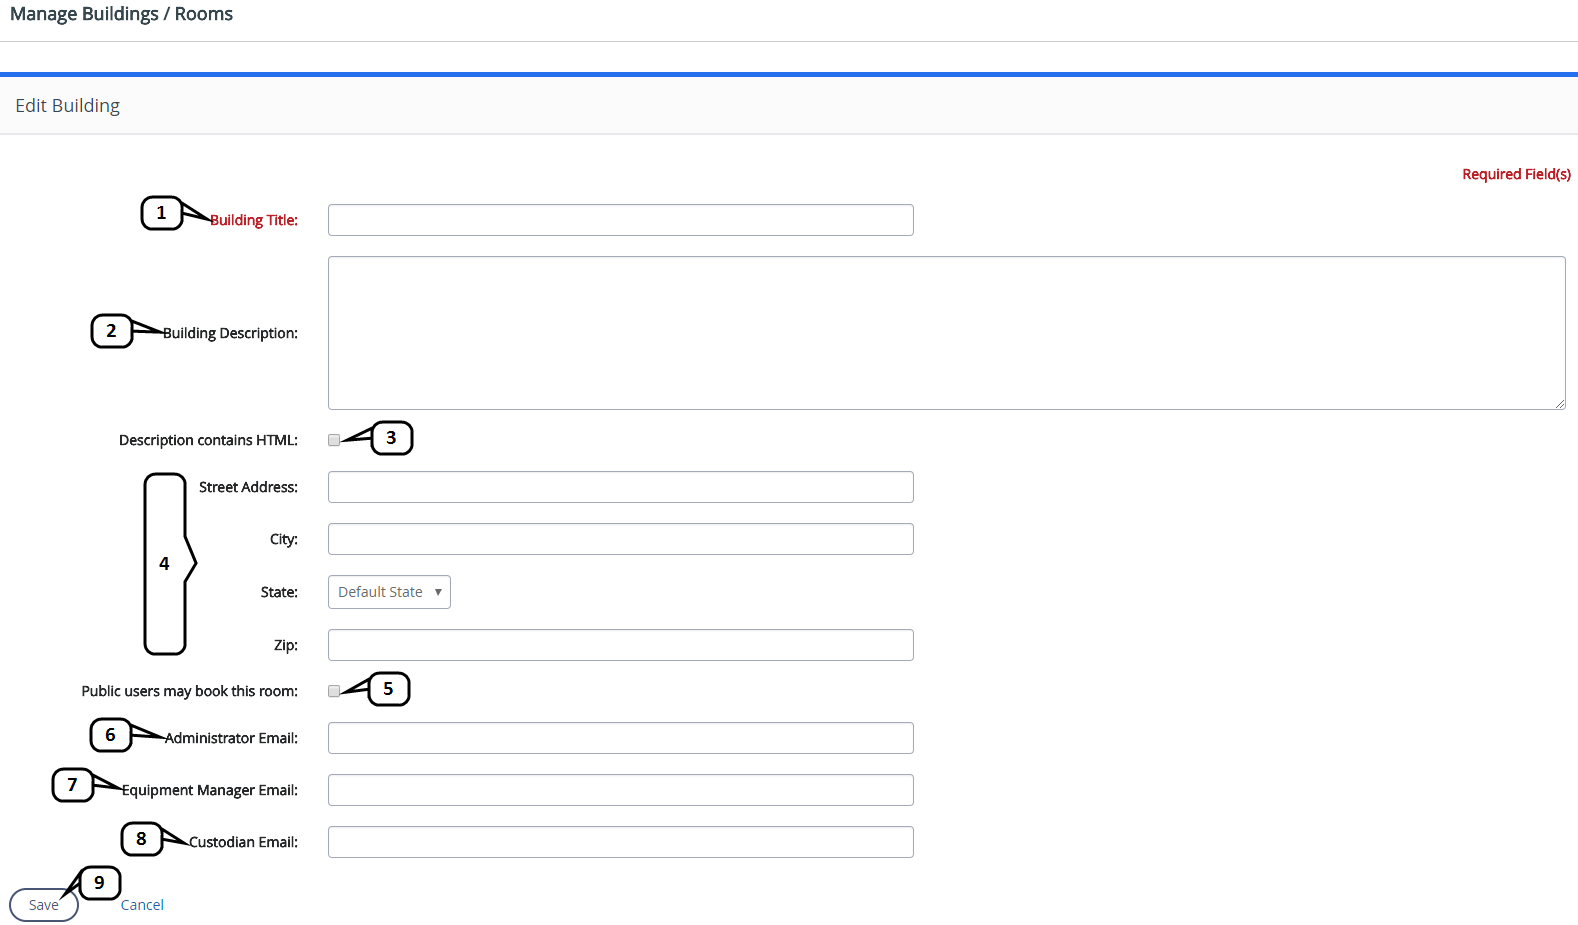
- Enter a Building Title. Note that this is the only required field.
- Enter a Building Description if desired.
- Check the Description contains HTML box if your Building Description contains any HTML.
- Enter the building location if desired. This can include the street address, city, state, and zip code.
- Check the Public users may book this room box if you would like to make the building public.
- Enter an Administrator Email if desired.
- Enter an Equipment Manager Email if desired.
- Enter a Custodian Email if desired.
- Click Save once you are finished.
Manage Rooms
Rooms can be edited, added, or removed on the Manage Rooms page.
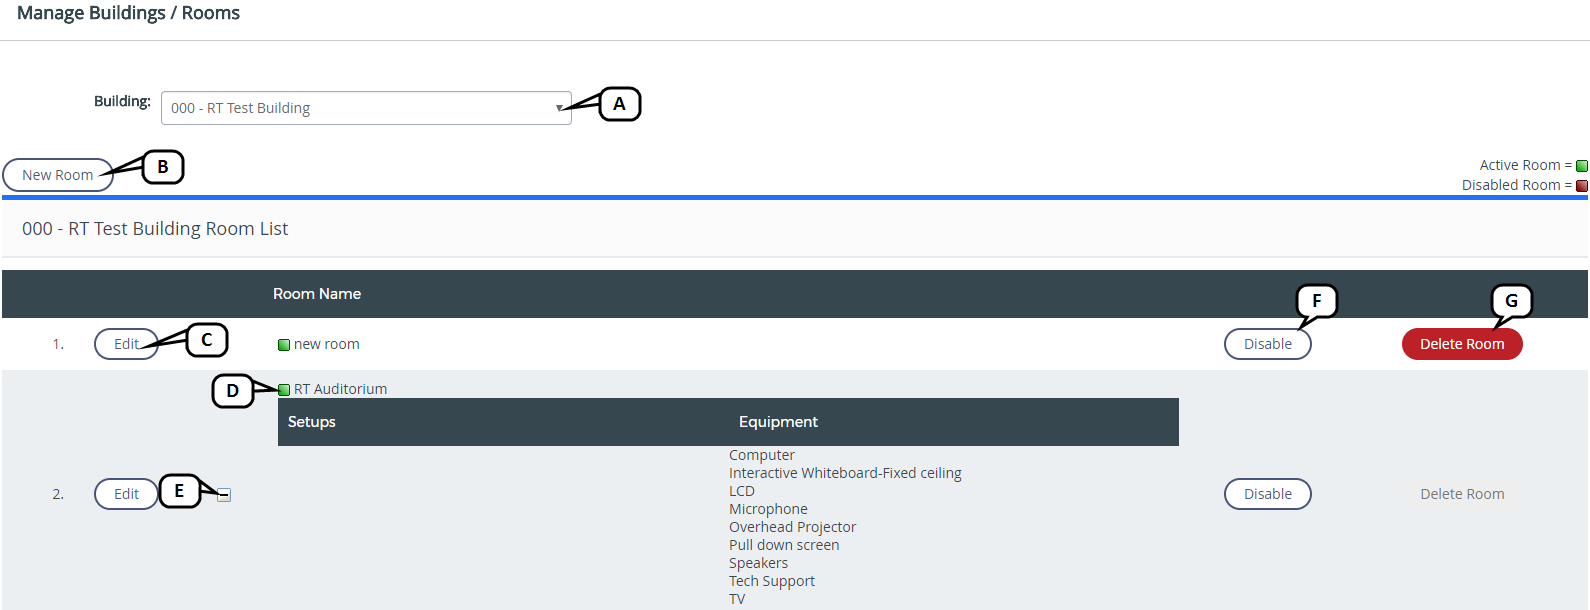
- Building drop-down: Click to select the desired building.
- New Room: Click to add a new room.
- Edit: Click to edit an existing room association.
- Colored Box: Green indicates an Active Room. Red indicates a Disabled Room.
- + or-: Click to expand or collapse the equipment setups associated with each room.
- Disable: Click to disable the room.
- Delete Room: Click to delete a room association.
New Room
To add a new room, follow these steps:
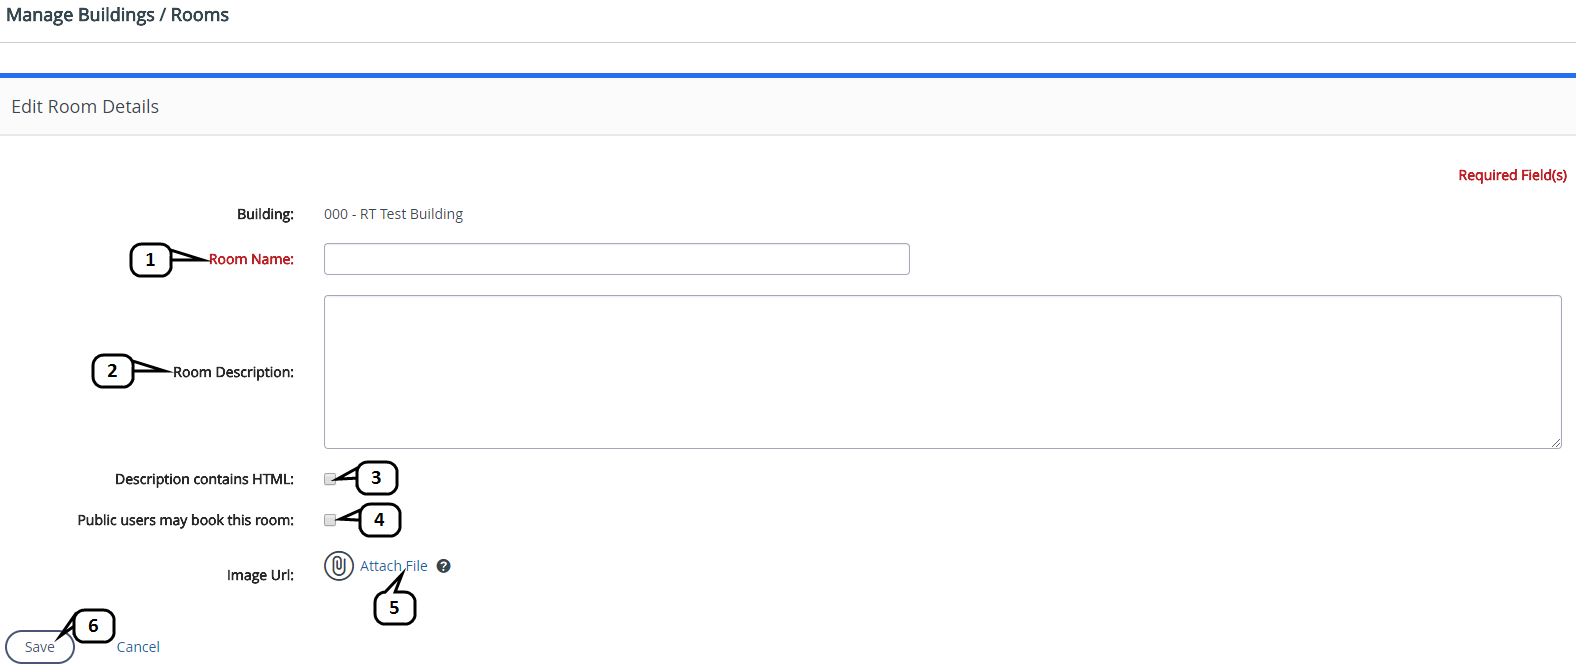
- Enter the Room Name. Note this is the only required field.
- Enter the Room Description if desired.
- Check the Description contains HTML box if your Room Description contains any HTML.
- Check the Public users may book this room box if you would like to make the room public.
- Click Attach File if you would like to attach a file associated with this room.
- Click Save once you are finished.
Edit Rooms
To edit room details, room managers, booking permissions, setups, equipment, and blackout dates, follow these steps:
Room Details
- Click Edit to access the Room Details page.

- Enter in the information for each section. Note the Room Name is the only required field.
- Click Save once you are finished.
Room Managers
- Click Edit to access the Room Managers page.

- Look up new users to add as Room Managers by First or Last name. In the search results list, select the user and click Add Selected.
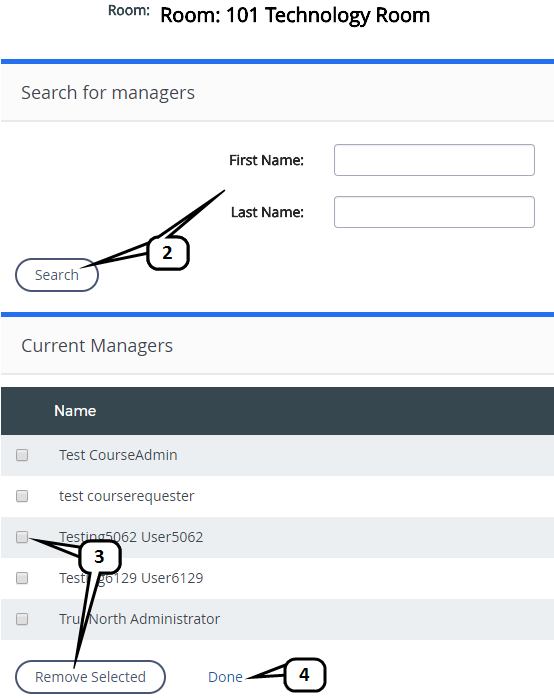
- Review the list of current managers for the room. Remove Current Managers by selecting their checkbox and clicking Remove Selected.
- Click Done once you are finished.
Booking Permissions
- Click Edit to access the Booking Permissions page.

- Look up new users to add to the Booking Permissions by First or Last name. In the search results list, select the user and click Add Selected.
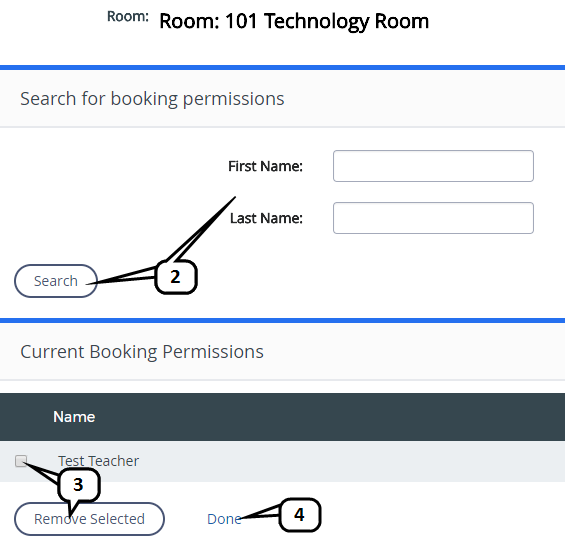
Review the list of current booking permissions for the room. Remove Current Booking Permissions by selecting the checkbox of the user you wish to remove and clicking Remove Selected.
- Click Done once you are finished.
Setups
- Click Edit to access the Setups page.

In the setups table, select the desired seat configuration and enter the number of seats needed.
Click on the name of the Setup and a new window will open with a description of that setup.
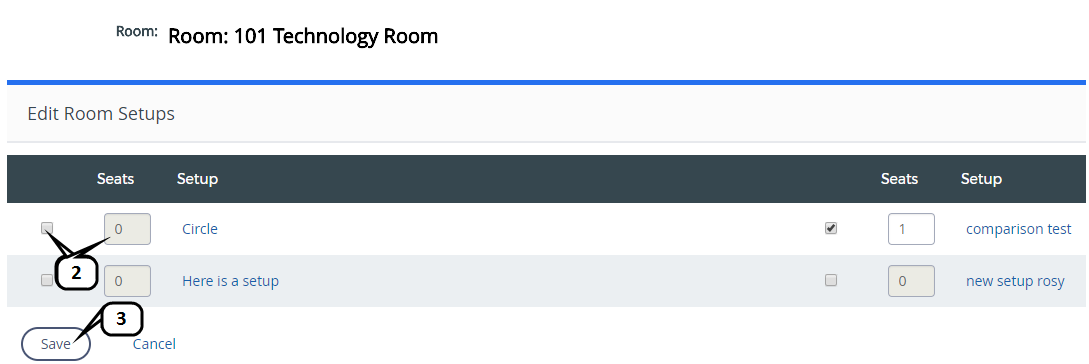
- Click Save once you are finished.
Equipment
- Click Edit to access the Equipment page.
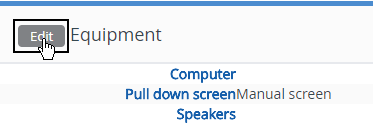
Select the desired equipment by checking the checkbox.
Click on the name of the Equipment and a new window will open with a description of that equipment.
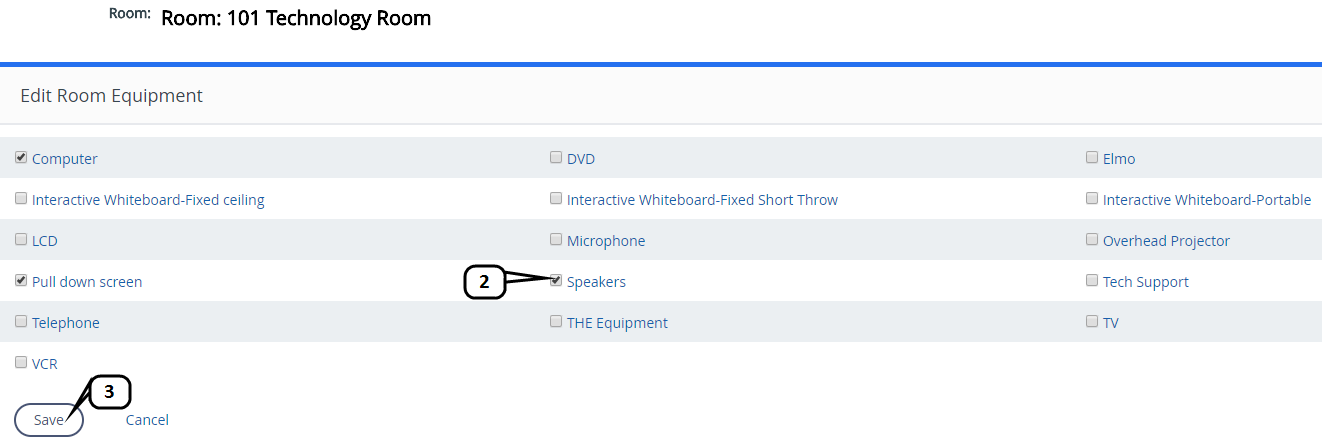
- Click Save once you are finished.
Blackout Dates
Any existing blackout dates will be listed in this section. Blackout Dates can be updated on the Blackout Dates page. See Add New Blackout Date for more information.
