
Before you can set up processes, you must first have created forms and defined workflows.
Get Started
-
Choose Configuration from the main navigation.
-
Click Setup Processes.
-
Choose the desired Process Category.
-
To update an existing process, click Edit.
OR
To create a new process, Clone an existing process or click Add.
Step 1 - Description
Enter the process details. The following process options have special considerations.
-
Enabled Advanced Scripting - Allow evaluators and direct reports to tag scripting notes and artifacts, and organize them, by rubric.
-
Rubric - Align the process to a rubric; required when using advanced scripting.
Process enabled is not selected by default. Return to the Description tab and select this option when you are ready for the process to be available to users.
Step 2 - Tasks
Determine the process steps.
-
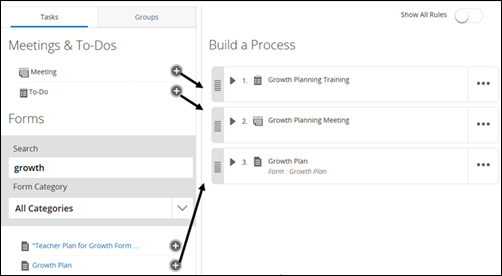
Click + to add meetings, to-dos, or forms to the process.
If advanced scripting is enabled, you have an additional option to filter by Forms aligned to process rubric. You can use forms aligned to the same rubric or no rubric, but you cannot use forms aligned to a different rubric.
-
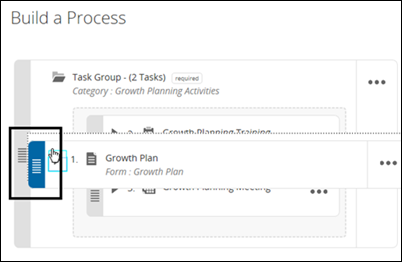
To group tasks into categories, click Groups, then click + to add a task group. Task groups are intended to map a collection of tasks into a single, larger category. You have two task group options.
-
Standalone Task Groups - Standalone task groups are not mapped to a district-defined category and will not be included in future reports.
-
District Defined Categories - District categories are are defined on the Configuration page. Examples include growth plans, observation cycles, SLOs, summatives. In the future, these will be used for reporting purposes (tracking progress).
-
-
Use the handles to group tasks, reorder tasks, and reorder groups as desired.
Use the handles to group tasks, reorder tasks, and reorder groups as desired. -
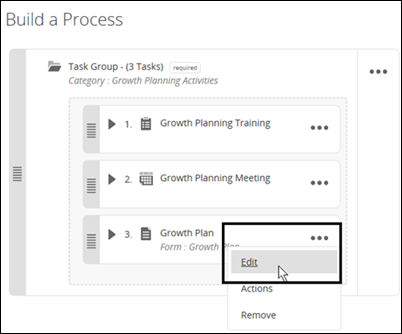
Click … > Edit to update the rules and settings for a task or group.
Step 3 - Data Transfer
Optionally, define data transfers for this process. Data transfers allow information to transfer from one form to another.
-
Click Add.
-
Choose the source and destination details.
-
Click Apply.
Step 4 - Deadline
Optionally, define a deadline for this process.
Step 5 - Automation
Optionally, define automation for this process. By defining an automation, a group of users can be mass-assigned to the process based on selected criteria.
-
Click Add.
-
Click Add Criteria and choose details.
-
Add criteria as necessary.
-
Determine when to run the automation.
After an automation has run, processes will display on your dashboard where they can be started or deleted.
Options for Saving
To apply your changes and move to the next step, click Save & Continue.
To apply your final changes to all users assigned this process moving forward, click Save.
Additionally, to apply your final changes to all users currently assigned the process, click Propagate Changes.