
Notes Library
Typically, the Evaluator uses the notes library to capture the evidence necessary to support legacy observation ratings. The notes library may also be used to support informal observations and/or employee self-assessments.
Access Notes Library
- Locate the activity for notes and click on the link.
- Click + New Note to begin entering notes.
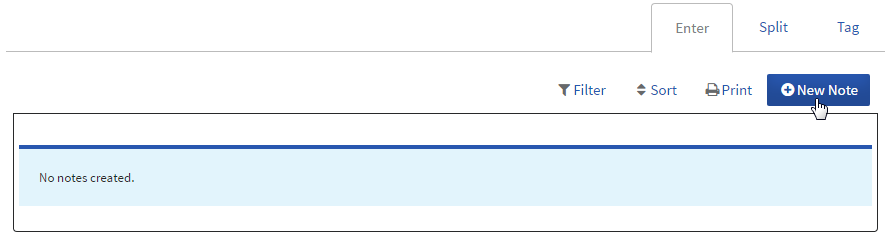
- A blank note space will appear.
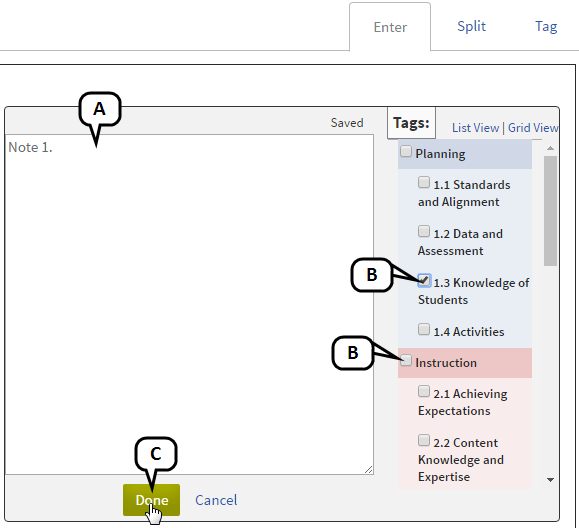
- Type notes, observations and feedback into the text box.
To tag (or align) the note to measures, click on the checkbox either next to an overall standard or next to specific elements.
If you find that a note covers too many concepts or aligns to too many measures, you may want to split it first. Instructions follow.
- When you are finished entering a note, click Done.
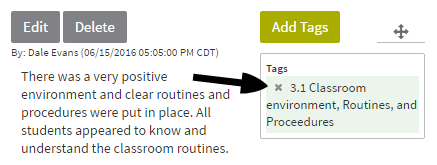
The note will now display as an entry in the notes library, and the standard or element you selected will display under Tags.
Split Notes
If you have taken your notes in the form of a script, and your note cannot be easily associated with a one or two relevant tags, it will be helpful to split the notes apart from each other so that they can be tagged individually.
To do this, click Split in the tabs above the notes. Then click Split in the note you want to break up.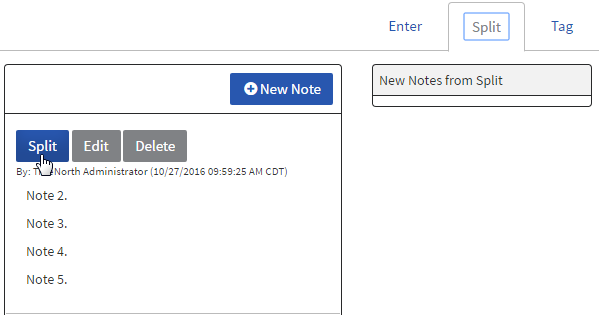
The note will be broken into suggested smaller chunks.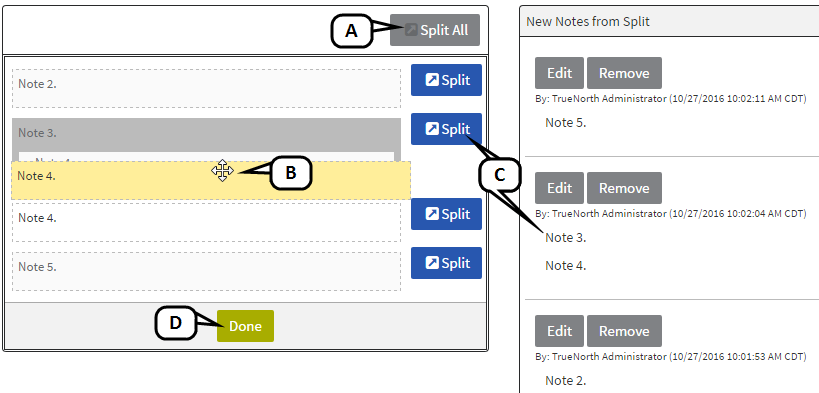
- Click Split All to split the entire note at each hard return. The split notes will be added automatically to New Notes from Split.
- Click and drag content chunks, represented by dotted outlines, to change how the note is split.
- When happy with a portion of the note, click the Split button associated to it. It will be added to New Notes from Split.
- When finished adding all split notes, click Done.
Return to the Enter tab to see the newly-split notes appear in the notes library. You’re original (unsplit) note will remain as well.
Tag Notes
You can add or update tags after the note has been created or split.
To do this quickly, click Tags in the tabs above the notes. There are several ways to manage tags on this screen.
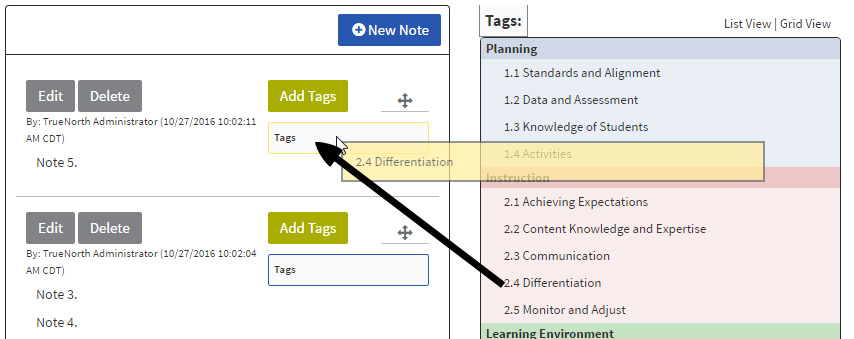
- Click on a standard or element tag and drag it to the tags entry box of the desired note.
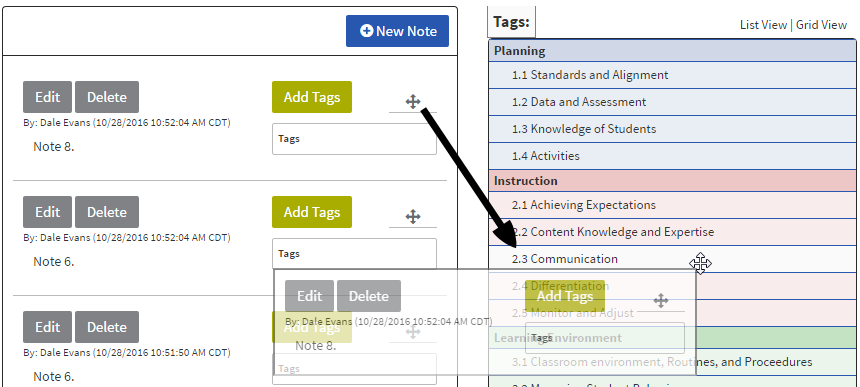
- Click on the four-way arrow for a note and drag it to the desired tag. The currently-selected tag will appear with a lighter color.
- Click Add Tags for a note. Click the plus (+) next to all applicable standard or element tags. Then click Done.
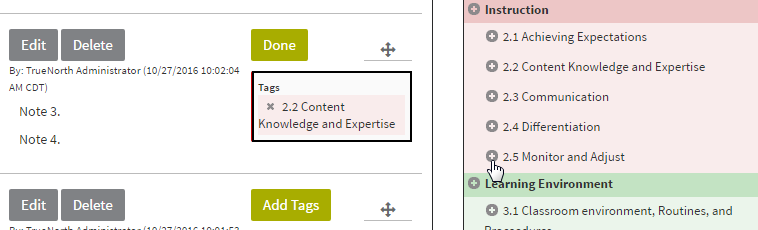
- Click the x to remove an incorrect tag.
All tags are saved automatically. Return to the Enter tab to see the notes appear in the notes library with the new tags.
Attach File to Notes
To attach a file to a note, click Attach File (A). Browse for and select the file you want to attach. (This file does not have to be in the content repository.) The linked file will appear in the Attachments section (B). Click the trash can icon to delete an attachment.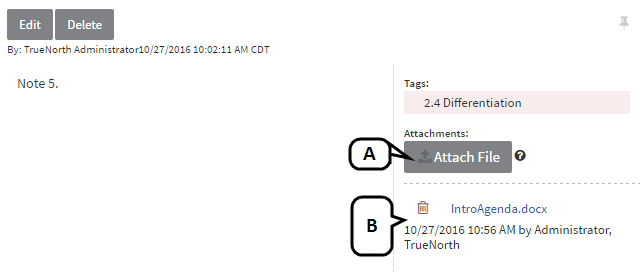
Other Notes Options
You have a few additional options when working with notes.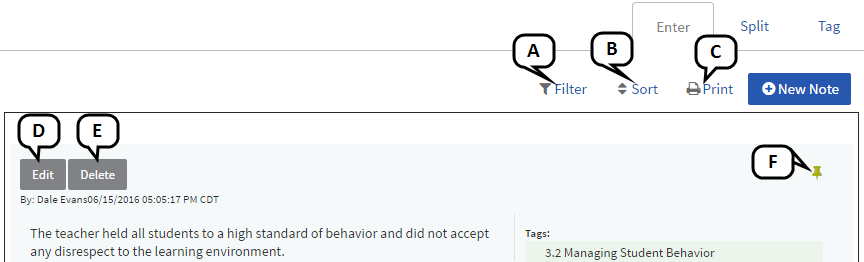
- Filter - Click Filter to filter the notes using a variety of criteria. Select your criteria, and click Filter again.
- Sort - Click Sort to sort the notes using a variety of criteria. Select your criteria from the drop-down menus provided, then click Sort again.
- Print - Notes can be presented in a printer-friendly format. Click Print. A PDF version of the current view of the notes (filters applied) will display for saving or printing.
- Edit - Click Edit to update the note. Click Done when finished.
- Delete - Click Delete to remove the note from the notes library. Click OK to confirm.
- Pin - Click the pushpin to pin a particular note to the top of the notes library. Only one note can be pinned.
Once your notes are complete, click Back at the top of the screen to return to the evaluation plan.
Shared Notes
If the notes library is not automatically shared with the Evaluatee, there may be a shared notes activity available.
- Locate the activity for shared notes and click on the link.
- Click View Notes at the top of the page to display notes that were taken in the notes library in previous activities.
- Any notes that you would like the Evaluatee to see should be copied and pasted into the text field labeled Shared Notes.
- Click Save.
- Click Back to return to the evaluation plan.