Editable Person Fields
When creating new users or editing existing users, you can set the specific user details. On the Editable Person Fields page, you can set up the drop-down fields in the user detail section.
To access this page, navigate to Administration > User Accounts and select Editable Person Fields from the menu on the left.

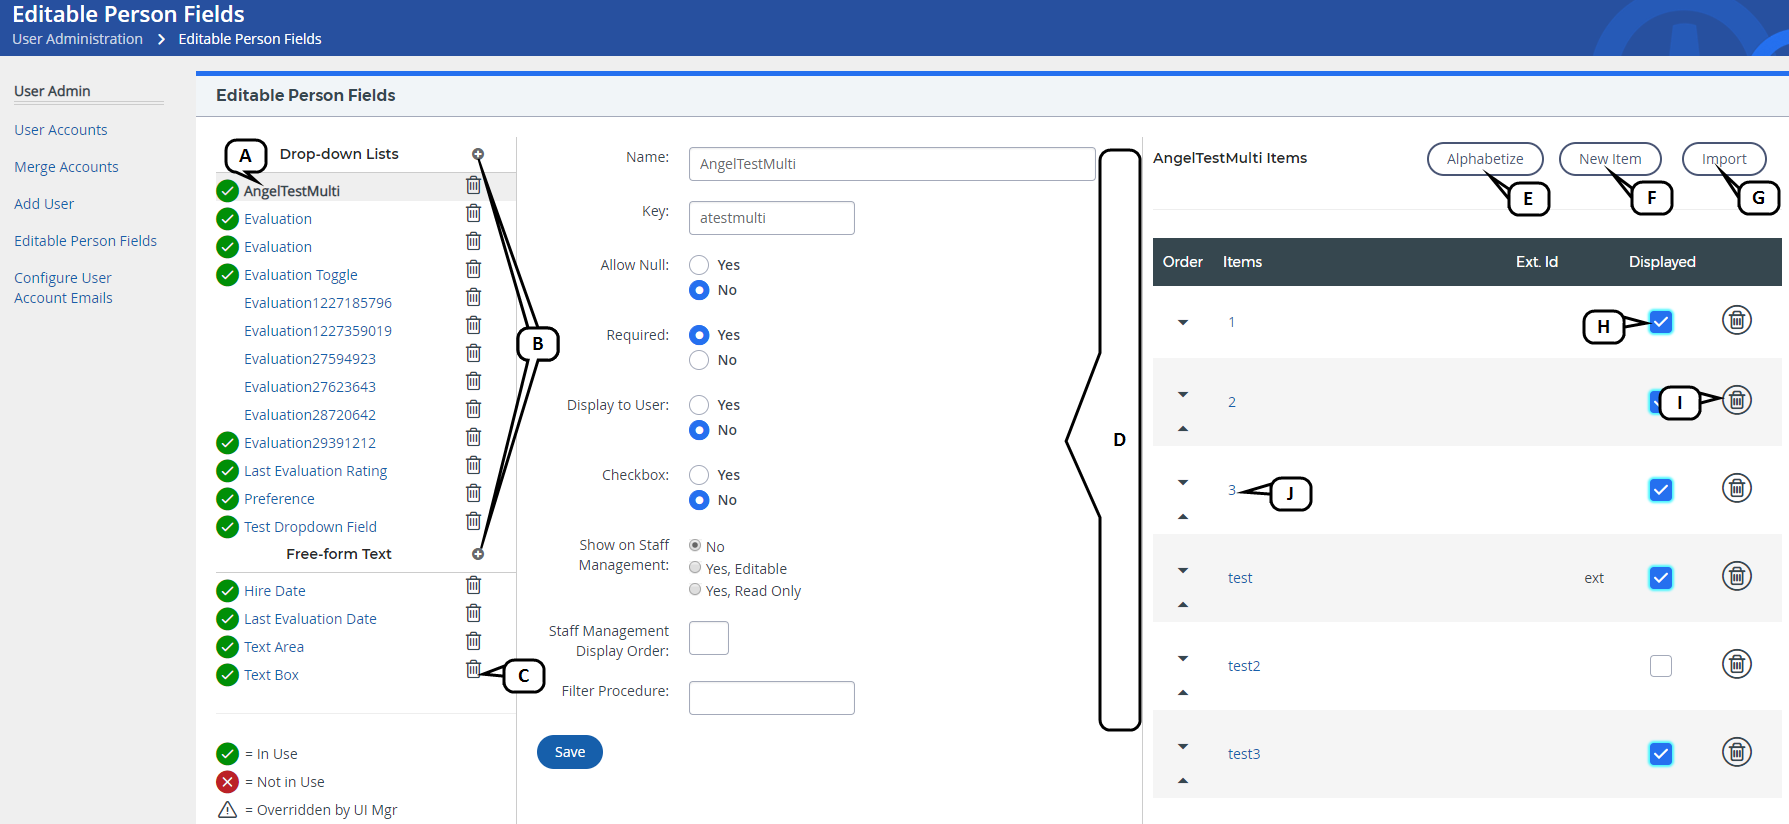
- Field Name: Select this to open the details and related items associated to that field.
- + Icon: Select this to add a new field in the selected category.
- Trash Can: Select this to delete a field from the selected category.
- Field Details: Select the desired details for that field. Options include:
- Name: The name of the field.
- Key: The key associated to the field.
- Allow Null: Select yes if this field can remain empty.
- Required: Select yes to make this field a requirement.
- Display to User: Select yes to display this field to the user.
- Checkbox: Select yes to provide a checkbox option for this field.
- Show on Staff Management: Select from three options - No (will not display); Yes, Editable (will display and user can update); Yes, Read Only (will display but user cannot update).
- Staff Management Display Order: Enter a value to set the display order for this field.
- Alphabetize: Select this to order the field items alphabetically.
- New Item: Select this to add a new field item.
- Import: Select this to import a file with field items.
- Displayed: Select this checkbox to display this field item in the user details.
- Trash Can: Select this to delete a field item from the selected field.
- Field Item Name: Select this to edit the field item details including the title/name and the external ID.
Import Editable Person Fields
To import Editable Person Fields from a file, follow these steps:
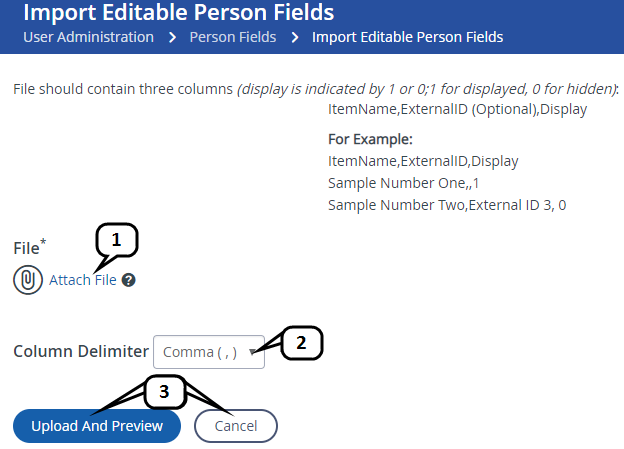
The file must not exceed 20 MB and should contain three columns: ItemName, ExternalID (optional), and Display. Display is indicated by 1 to display or 0 to hide.

- Select Attach File to browse the files on your computer and select the appropriate file.
- Select the Column Delimiter drop-down and select either Comma or Pipe.
- Select Upload and Preview to upload the file or select Cancel to exit the import page.
