
Create a User Account
When enabled for your role, you can add a new user to the system by following these steps.
- From the User Accounts page, click Create New User.
- Fill in all fields on the user account form. When finished, click Save.
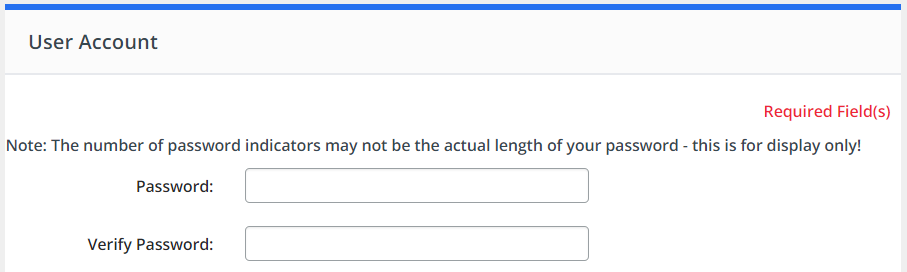
- Set a password for the new user by entering it in the Password and Verify Password fields. (This user will have the ability to change the password and set the security question on their initial log-in.) Then click Save & Return.
- You will be returned to the user account management screen, and the user will receive an email with their user name and link to reset their password.
Demographics
For most users created, you can assign specific demographics that can be used to target specific content and features to them.
- From the user account management screen, click Set Demographics.

- Use the + and - to expand/collapse the selection tree. Options will depend on the staff position assigned to the user. Select the desired checkboxes at any level of the tree.
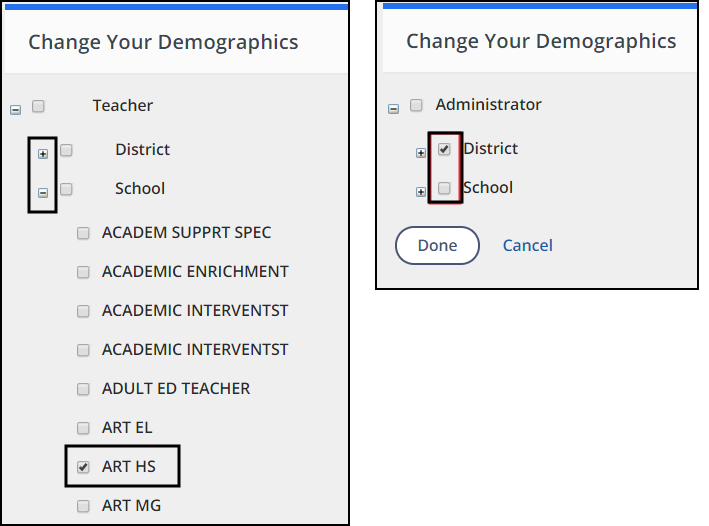
- When finished, click Done.
Locations
For all users created, you can assign specific locations that can be used to target specific content and features to them.
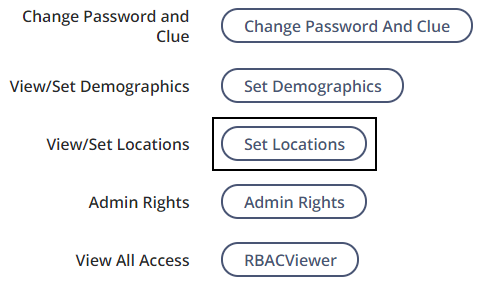
- From the user account management screen, click Set Locations.
- Use the drop-down menus to select the location for the user. Then click Add.

- Continue to add locations as necessary.
- All associated locations will be listed.
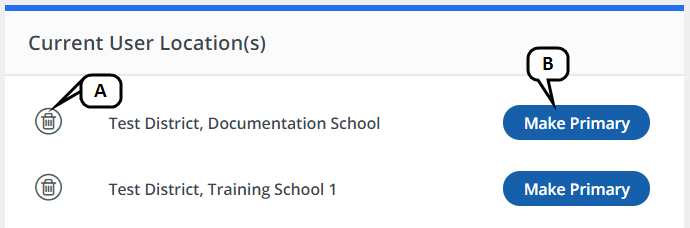
- To remove a location, click the trash can icon.
- To set a location as the user's main location, click Make Primary.
- When finished adding and managing locations, click Done.
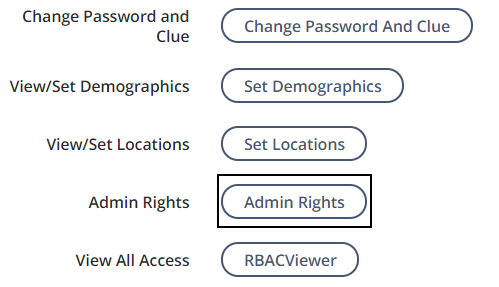
Admin Rights
If you selected an administrative role for the user you are creating (via the Admin Type field), you can assign specific locations to which the administrative rights will apply.
Super Users have access to all locations and therefore will not use this setting.
- From the user account management screen, click Admin Rights.
- Use the drop-down menus to select the location for the admin. Then click Add.
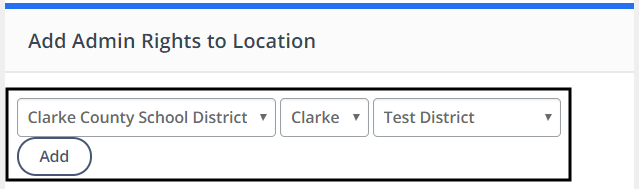
- Continue to add locations as necessary.
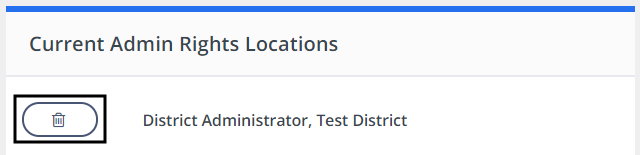
- All associated locations will be listed. To remove a location, click the trash can icon.
- When finished adding and managing admin locations, click Done.